--Photoshop-- Shiny Glamour Text
Learn how to make a nice looking glamour text in Adobe Photoshop in a few steps, in this tutorial
Shiny Glamour Text:
1. Open a new document (mine was 500*160), fill it with black color and type something in white with text tool:
2. Now go Layer>Layer Style>Blending Options or simply double click on text layer in layer palette and set:
3. Hold down Ctrl button on keyboard and click on the text icon in layer palette to make selection. Now go Select>Modify>Contract and set contract to 4 pixels:
4. Make new layer and fill it with white. Now you have:
5. Now apply these filters:
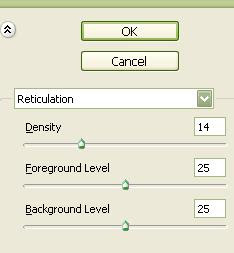
Filter>Sketch>Reticulation:
Filter>Texture>Grain:
Filter>Brush Strokes>Sprayed Strokes
6. Double click on last layer in layer palette and set:
and after those steps you have:
7. Now we have to make some shiny stars. Make new layer, select Line Tool
and draw "X" somewhere on black surface.
Select Brush tool
and make spot on the center of "X". It should look like this:
Select Eraser Tool with soft edges and erase ends of "X" symbol. Set Opacity as you like and you should have this:
8. Duplicate last layer few times and drag shiny stars over edges of letters and thats it!
This is what you've got as your final result!


